
I absolutely hate to throw anything away. Reduce, reuse, recycle, right? So, when my ah-hem vintage 😉 Christmas tree started shedding I began looking for ideas to re purpose it.
Enter, the swag 😊

I started with two of the longer pieces (would be bottom of tree) to use for each swag.

First I bent the tops so they would hang.

I covered them with duct tape (like any good southern girl would do) so they wouldn’t scratch my lanterns. Don’t worry, I covered it up at the end 😉


I cut a few limbs from another piece to camouflage the duct tape. Just wrap them all around the tops.


See, no duct tape 😊

Note: Because these were my first ones, and I could reach them, I hung mine before decorating so I could see what I wanted on them. You could certainly do this part on the table though
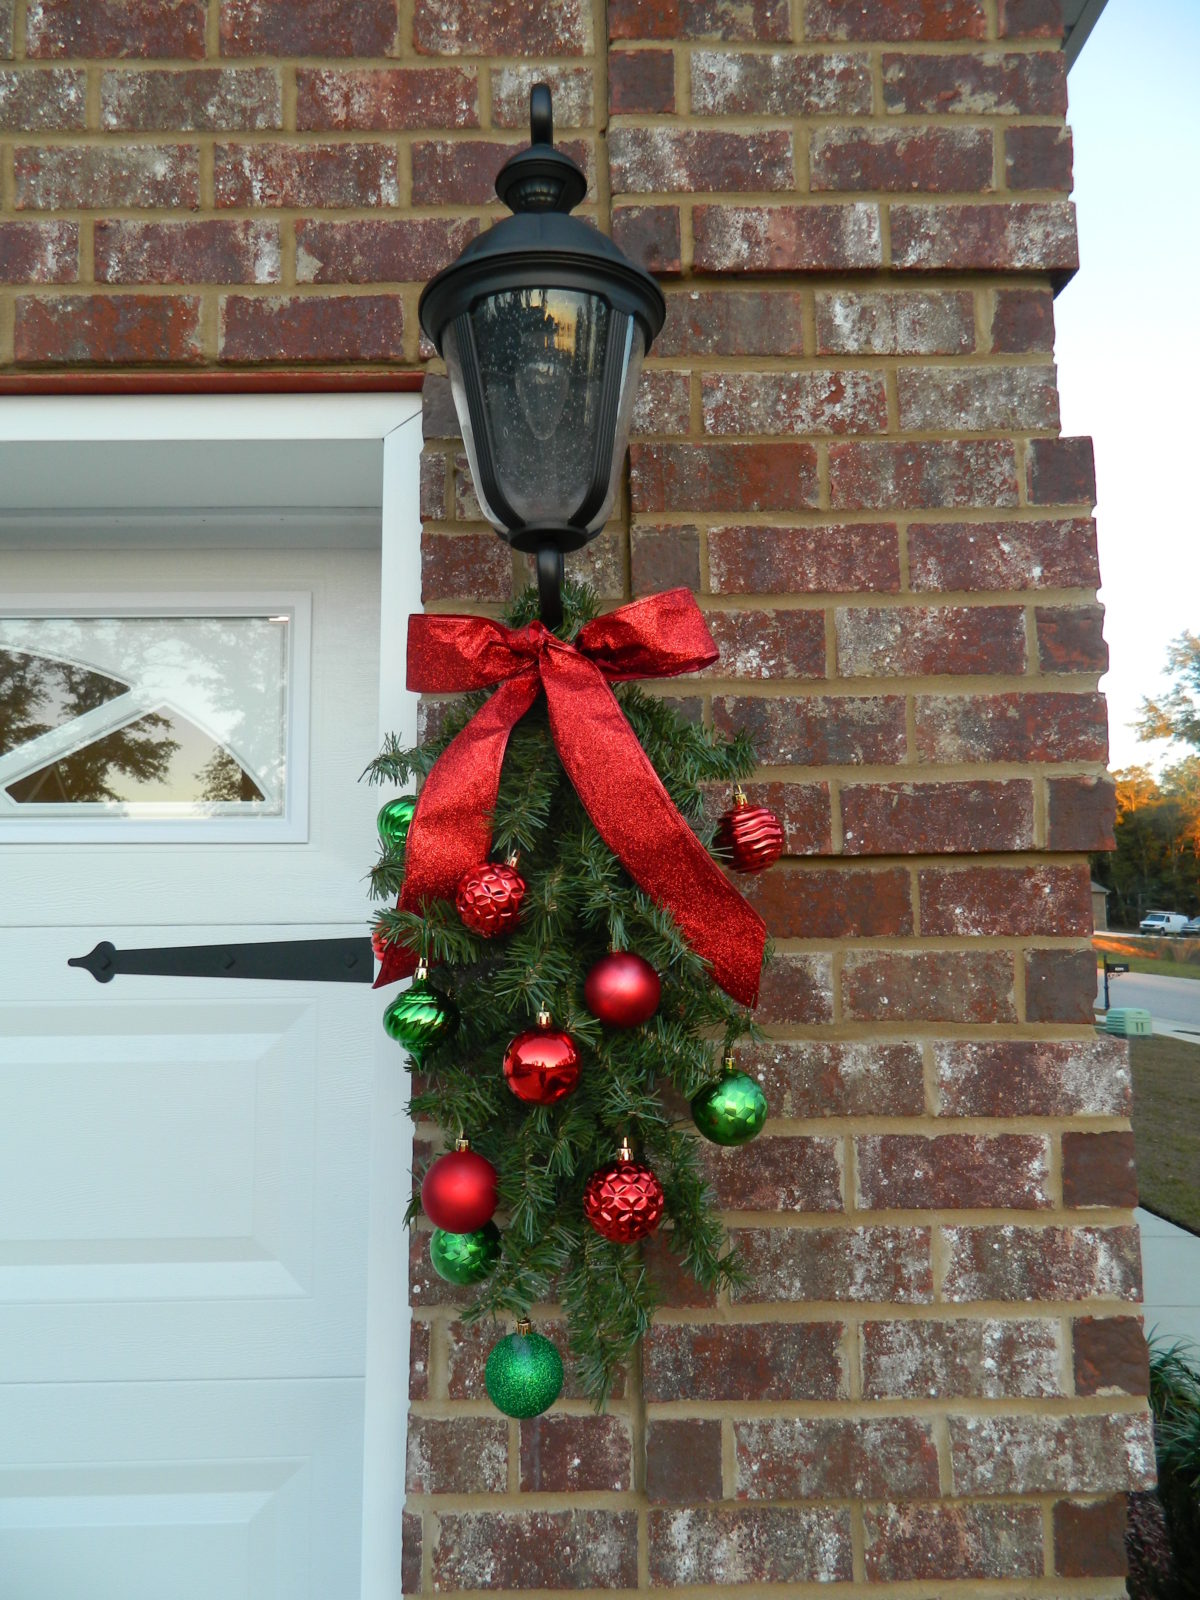
Next I added the ornaments using regular ornament hangers. I just wrapped them all the way around the branches so they wouldn’t fall in the wind and weather
Added a bow and va-la I have SWAG!
Like I said, this was my first one so it’s pretty plain but you could add any type of ornaments or decor to yours. Like pine cones, etc.
I’d love to know if you’ve tried this or what kind of diy Christmas decor you’ve made. Let me know in the comments below.
The video of the day is from Ripley’s Aquarium in Gatlinburg, Tennessee 🙂 Enjoy!


I love your swag. I actually prefer them over wreaths. They suit my front door better. I’ve made a few for others and love your idea for creating the hook. I’m going to use that on my next one. The duct tape is a genius idea for preventing scratches. Love it!
Thank you Tracey! I hadn’t thought of using on the door but that would look beautiful!
This is a great idea! I love how you repurposed your Christmas tree into the swag, I would not have thought to do that! The final product looks so good with the ornaments hanging on it and the beautiful ribbon. Thanks for sharing!
Thank you Sarah! I ended up using another section of it for a mail box swag <3
“Like any good southern girl would do”… 🤣 I love it!! And I can relate! So creative!
Lol Yes Brittany!! Especially the duct tape right? 😉 Thank you!!
The step by step picture are very helpful!! Can’t wait to make my own!
I’m so glad you liked it <3 Thank you!!